
So when I try to implement animation using Unity, I found the whole process not only too long, you also need to do repeat steps over and over for a tiny modify. Anyway, if you feel the same, this is a post for you, the code will be at the bottom.
Target
- Put all sprites/spritesheets in a folder
- Press menu button
- Turn spritesheet to <name>.anim at output folder
- Use .anim file to play animation
Expectation
Here is the folder structure I use:
- Assets(root)
- Resources
- Effects
- 60
- 120
- Json
- …
- Effects
- Resources
- Scripts
- …
After process Assets will create a new directory called Animations/Effects, we will see our animations there.
Code
3 files needed here, first is the good old global config:
// Global.cs

    public static string RESOURCE_PREFIX = "Assets/Resources/";
    public static string EFFECTS_FOLDER = "Effects/";
    public static string ANIMATION_FOLDER = "Animations/";
Next we have the EffectManager:
// EffectManager.cs

    [MenuItem("AssetDatabase/LoadEffects")]
    static void ImportEffects() {
        GetFrameRate(Global.RESOURCE_PREFIX + Global.EFFECTS_FOLDER);
    }

    private static void GetFrameRate(string root) {
        // Get framerate
        var frameRates = Directory.GetDirectories(root);
        foreach (var frameRate in frameRates) {
            // frameRate is also the name of the folder
            LoopDir(frameRate, int.Parse(Path.GetFileNameWithoutExtension(frameRate)));
        }
    }

    static void LoopDir(string path, int frameRate) {
        var dirs = Directory.GetDirectories(path);
        if(dirs.Length > 0) {
            foreach (var dir in dirs) {
                LoopDir(dir, frameRate);
            }
        } else {
            GetSpriteFromDir(path, frameRate);
        }
    }

    static void GetSpriteFromDir(string dir, int frameRate) {
        var sprites = Resources.LoadAll<Sprite>(dir.Replace(Global.RESOURCE_PREFIX, ""));
        var name = Path.GetFileNameWithoutExtension(dir);

        Utils.makeAnimation(name, sprites, frameRate);
    }
Last we have Utils:
// Utils.cs
public static AnimationClip makeAnimation(string name, Sprite[] sprites, int frameRate) {
AnimationClip animClip = new AnimationClip();
animClip.frameRate = frameRate; // FPS
//animClip.wrapMode = WrapMode.Loop;
EditorCurveBinding spriteBinding = new EditorCurveBinding();
spriteBinding.type = typeof(SpriteRenderer);
spriteBinding.path = "";
spriteBinding.propertyName = "m_Sprite";
ObjectReferenceKeyframe[] spriteKeyFrames = new ObjectReferenceKeyframe[sprites.Length];
for (int i = 0; i < (sprites.Length); i++) {
spriteKeyFrames[i] = new ObjectReferenceKeyframe();
spriteKeyFrames[i].time = i * 0.1f;
spriteKeyFrames[i].value = sprites[i];
}
AnimationUtility.SetObjectReferenceCurve(animClip, spriteBinding, spriteKeyFrames);
var outpath = "Assets/" + Global.ANIMATION_FOLDER + Global.EFFECTS_FOLDER;
if (!Directory.Exists(outpath)) {
Directory.CreateDirectory(outpath);
}
AssetDatabase.CreateAsset(animClip, outpath + name +".anim");
AssetDatabase.SaveAssets();
AssetDatabase.Refresh();
return animClip;
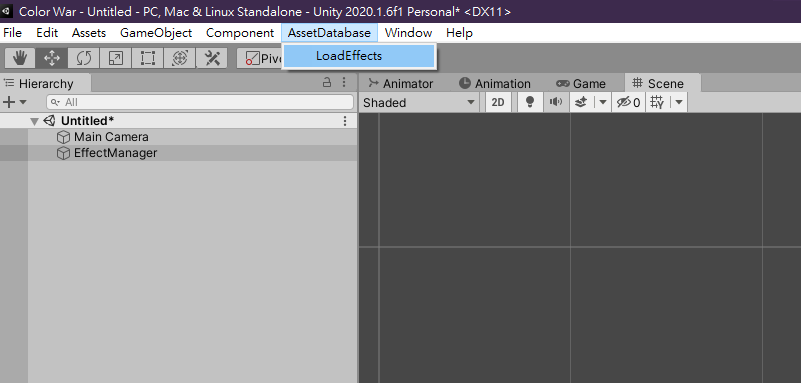
}After you add these files, you should see your Unity menu have a new category AssetDatabase with a option LoadEffects as shown at the video below, give it a clickie click and everything should magically happened!
Video:
Hmm, OBS seems would not record menu bar, the option will look like this:
Play
Unity have its’ own way on animation system, which might suit in other situations. But now I just want to add a new GameObject and make it play our .anim, get a callback when done, then destroy it.
Introducing Animancer, a handy and free plugin that is perfect for this task! The reason I use Animancer is because I can just drag my .anim and play right away!
Add these code to EffectManager:
// EffectManager.cs

    public GameObject SpawnEffect(AnimationClip effect, Vector3? position, Vector3? scale, Vector3? directionToAim, Color? color, Action afterAction) {
        if (position == null) position = Vector3.zero;
        if (scale == null) scale = Vector3.one;
        if (directionToAim == null) directionToAim = Vector3.zero;
        if (color == null) color = Color.white;


        var newEffectChild = new GameObject();
        newEffectChild.transform.position = (Vector3)position;
        newEffectChild.transform.localScale = (Vector3)scale;
        Utils.LookAt2D(newEffectChild, (Vector3)directionToAim);

        newEffectChild.AddComponent<Animator>();
        var spriteRenderer = newEffectChild.AddComponent<SpriteRenderer>();
        var animancerComp = newEffectChild.AddComponent<AnimancerComponent>();
        if (color != null) {
            spriteRenderer.color = (Color)color;
        }

        var animancerState = animancerComp.Play(effect);
        animancerState.Events.OnEnd = () => {
            afterAction?.Invoke();

            Destroy(newEffectChild);
        };
        newEffectChild.SetActive(true);

        return newEffectChild;
    }

    private void Start() {
        SpawnEffect(testEffect1, new Vector3(0, 0, 0), null, null, null, PlayTestEffect2);
    }

    private void PlayTestEffect2() {
        SpawnEffect(testEffect2, new Vector3(0, 0, 0), null, null, null, PlayTestEffect3);
    }

    private void PlayTestEffect3() {
        SpawnEffect(testEffect3, new Vector3(0, 0, 0), null, null, null, null);
    }
And these for rotation in Utils (Won’t be use in this tutorial)
// Utils.cs

    public static void LookAt2D(GameObject objectToRotate, Vector2 direction) {
        float angle = Mathf.Atan2(direction.y, direction.x) * Mathf.Rad2Deg - 90;

        objectToRotate.transform.eulerAngles = Vector3.forward * angle;
    }
Now we can add a EffectManager in Unity inspector and drag effects, hit play and kick our feet up!
Video:
End
Now we have a easy to use animation effect pipe line for our game! Well actually we can improve it even more using Pooling system, but that will be another story to tell next week!
Download these 3 files with GoogleDrive: Here